April 22, 2020
Hunt and Peck typing method versus touch-typing. Which method is preferred when learning how to type?

Touch-typing is a skill that grows from training your fingers to automatically hit the correct characters on a keyboard in order to type the words and sentences you wish to compose. The method is called touch-typing because, over time, your fingers are trained to find the relevant letters by touch as opposed to look – so that you no longer need to look at the keyboard. This frees you up to look directly ahead at the screen and concentrate on what you are typing and how you want to present it. Thus making you more efficient and capable of multitasking.
Hunt and Peck typing, on the other hand, refers to typing through looking at the keyboard, hunting around for the character key you wish to press – and then pecking at it! The Hunt and Peck method is less efficient as it forces your attention onto the keyboard in order to find characters, instead of onto the screen, where you need to look to monitor your work. The hunt and peck method of typing is not a method as such, it is not fixed, therefore there is no rhyme or reason to it. Consequently, any finger can hit any key at any time, which leaves little room for developing proficiency or typing speed. Thus making you less efficient and incapable of multitasking.
How touch-typing works:
The QWERTY keyboard – so-called from the word QWERTY – which can be made up from the letters on the top row of the keyboard – is specifically designed to work for touch-typing. The layout of the entire keyboard complete with all letters of the alphabet, punctuation marks, numbers, and symbols, is fashioned in a manner that optimises correct finger movement for touch-typing. If you want to read more about the QWERTY keyboard check out our blog on why the QWERTY keyboard has survived so long compared to other easier input methods.
In essence, the method entails teaching individual fingers specific letters and characters to press on the keyboard – and then memorising these movements. Each finger types a fixed selection of letters and nothing else. Once all fingers know where they must go – so to speak – they can work in combination to efficiently and effectively cover the entire alphabet and keyboard.
With practice, touch typing becomes much easier and once the system ‘clicks’, the learner can go on to achieve higher typing speeds and build up their words-per-minute rate.
Touch-typing – correct technique
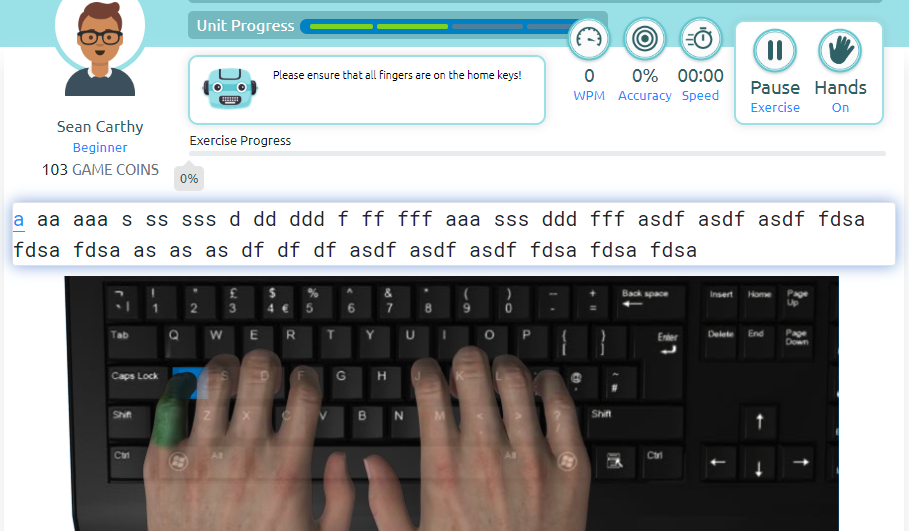
Touch typing is the ability to type without looking down at the keyboard. It is a skill that needs to be learned and it becomes better as you practice using the correct technique. The correct technique is to place your fingers on the home keys, left-hand fingers should start with the little resting on A button and the main index finger on F button on the keyboard. The right-hand fingers should start with the index finger on J button and the little finger on the ; semicolon button. If you are interested in learning how to touch type, check out our new typing tutor Typewiz which is specifically aimed at teaching children how to touch type in a fun and interactive way.
On a practical basis, the system can be explained as follows:
Left hand – what letters your left fingers should be typing:
- Little finger (pinkie): types the letters A, Q and Z.
- Ring finger: types the letters S, W and X.
- Middle finger: types the letters D, E and C.
- Index finger: types the letters F,R,V,B,G, and T
Right hand – what letters your right fingers should be typing:
- little finger (pinkie): types the following characters Semi-colon(:), P and Full stop (.) only.
- Ring finger: types the characters L, O and comma (,).
- Middle finger: types the letters K, I and M.
- Index finger: types the letters J,U,M,N,H, and Y
Already you can see from looking at the keyboard that just learning these three-finger movements will help you cover nine letters in the alphabet and a good left-hand portion of the keyboard. Complete touch-typing will show you where all eight fingers go on the keyboard (the thumbs are only used to press the Space Bar) so that, when working together, your fingers can fly around the keyboard as you touch-type and build up your typing speed.
Our new typing tutor typewiz.com is now available to any student that wants to learn how to touch type.
- Typewiz is a new fun and interactive way to learn to touch type.
- Typewiz is run through our Searsol centres monitored by our professional Searsol tutors (Ireland only).
- Students get to select different avatars as they progress up the lessons.
- Students can earn coins based on their performance on the course.
- Coins can then be used in our games arcade where each coin spent allows the student to access one game.
- Students can earn different word per minute badges (Bronze, Silver or Gold) as they become faster at typing.
- Students can earn lesson badges as they progress up the lessons.
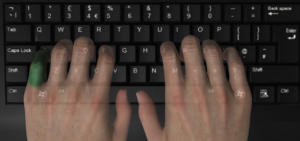
- Realistic hands with a green finger which shows the user what keyboard button to press.
- Graphs of all previous percentage scores with Words Per Minute (WPM) are available to access for the student at all times.
- Typewiz is a self-paced course that allows students to work at their own pace in a classroom environment or at home.
If you are interested in trying out typewiz. Chat with us online or contact Searsol at info@searsol.com.